> ## Documentation Index
> Fetch the complete documentation index at: https://wundergraphinc-brendan-add-external-directive.mintlify.site/llms.txt
> Use this file to discover all available pages before exploring further.
# Okta (OIN version)
> Configure SCIM with Okta using the app from OIN.
### Steps to set up SCIM with Okta
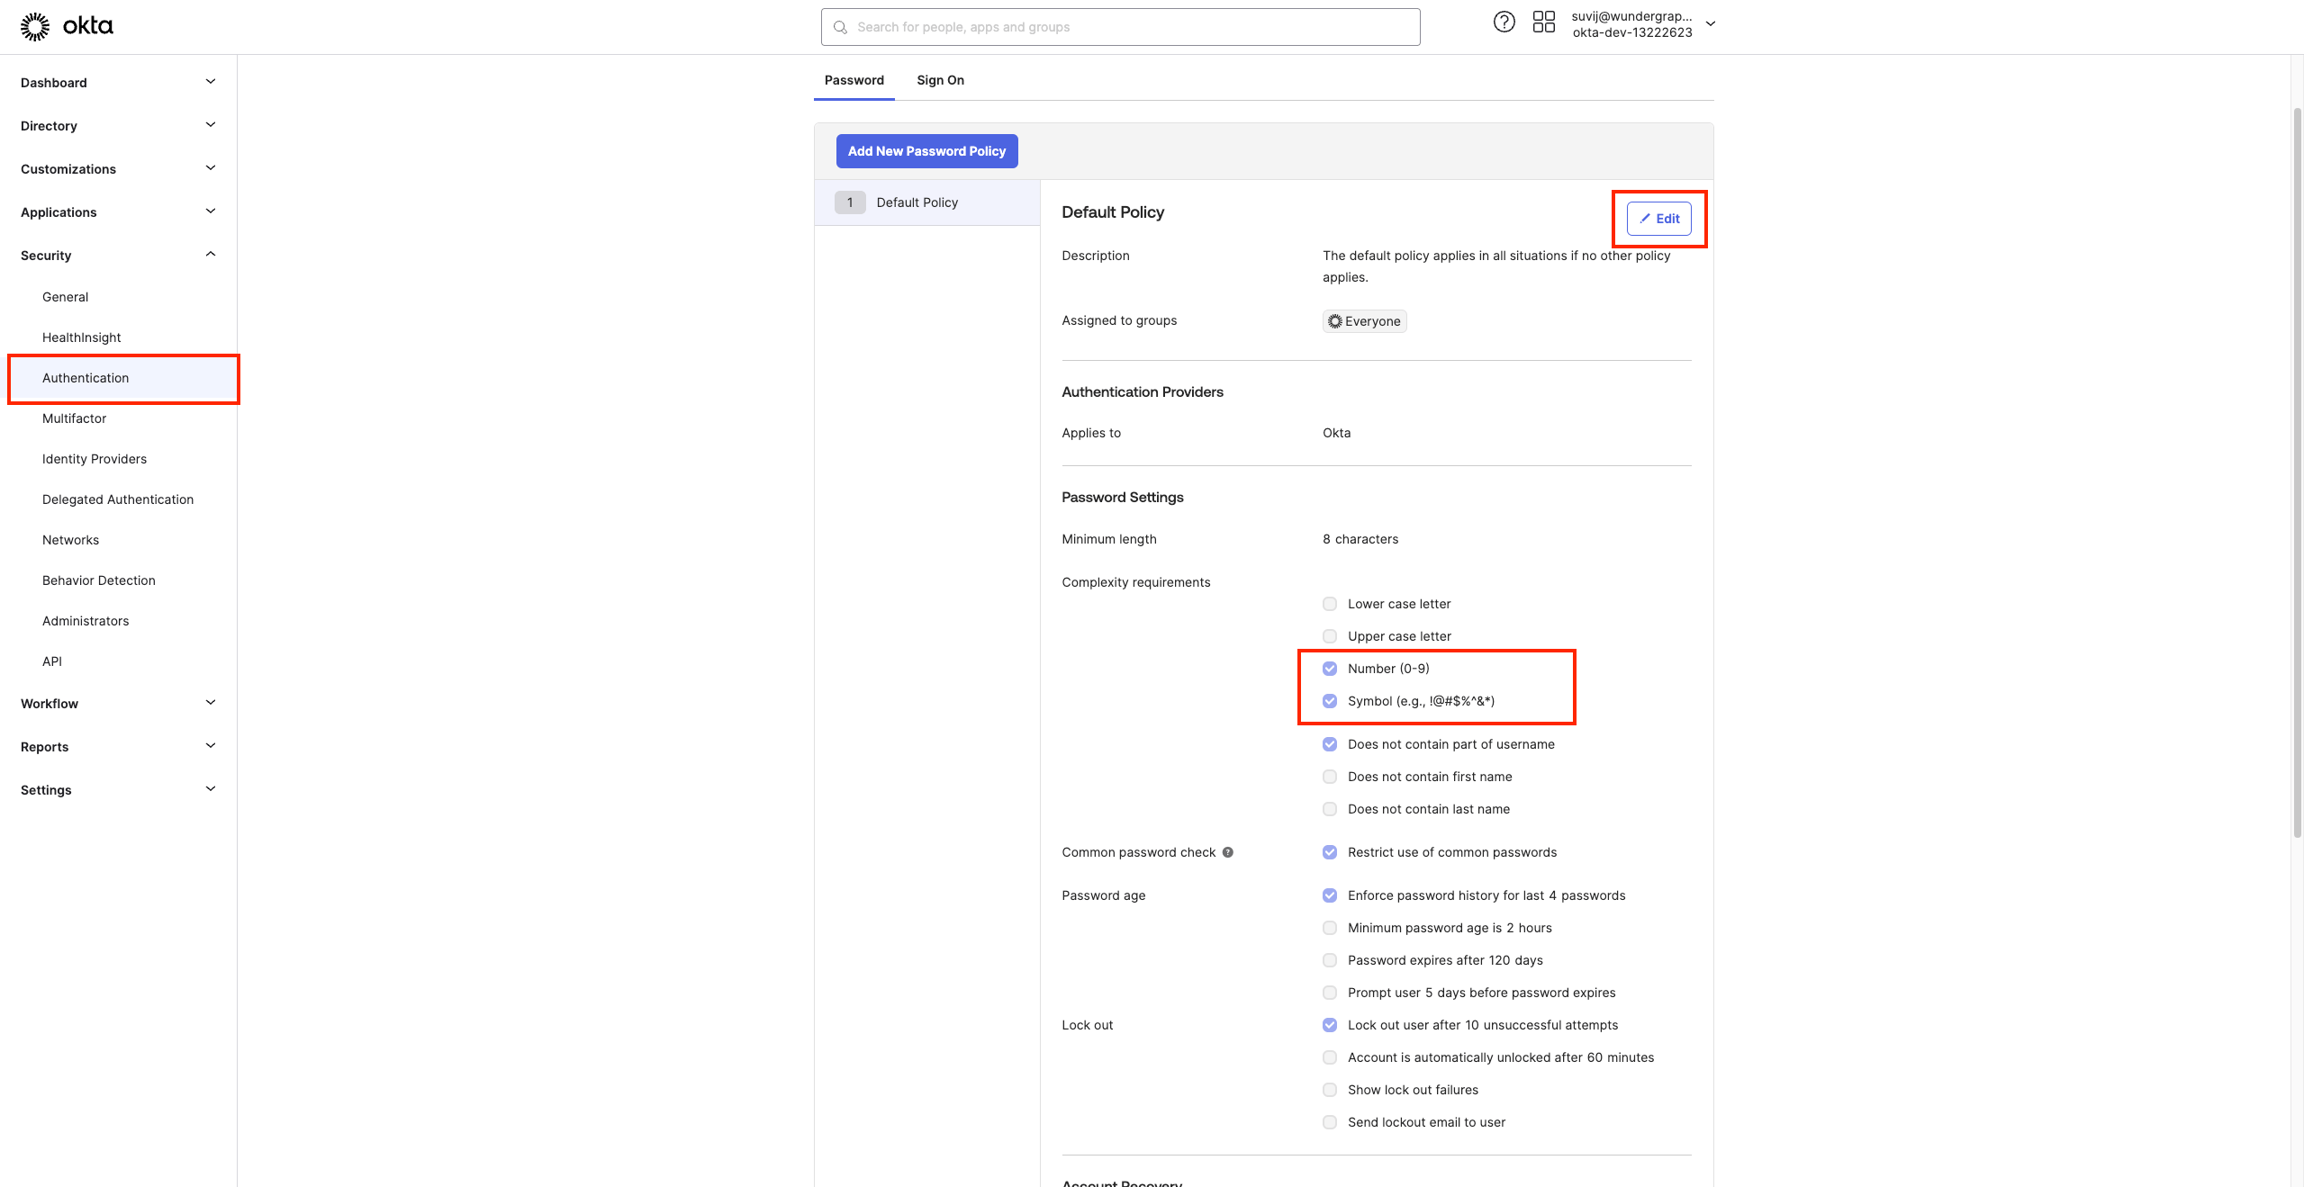
Set up the password policy (password should contain at least one number and one symbol), if using the **Classic Engine on Okta** follow the below steps**,** or if using the **OIE engine,**follow the steps as mentioned in this \*\*\*\*[**Okta guide**](https://help.okta.com/oie/en-us/content/topics/identity-engine/authenticators/configure-password.htm)**.**
* Navigate to Security -> Authentication on your Okta Administrator Dashboard.
* Click Edit and update the password policy by enabling Number and Symbol, then click on Update Policy.
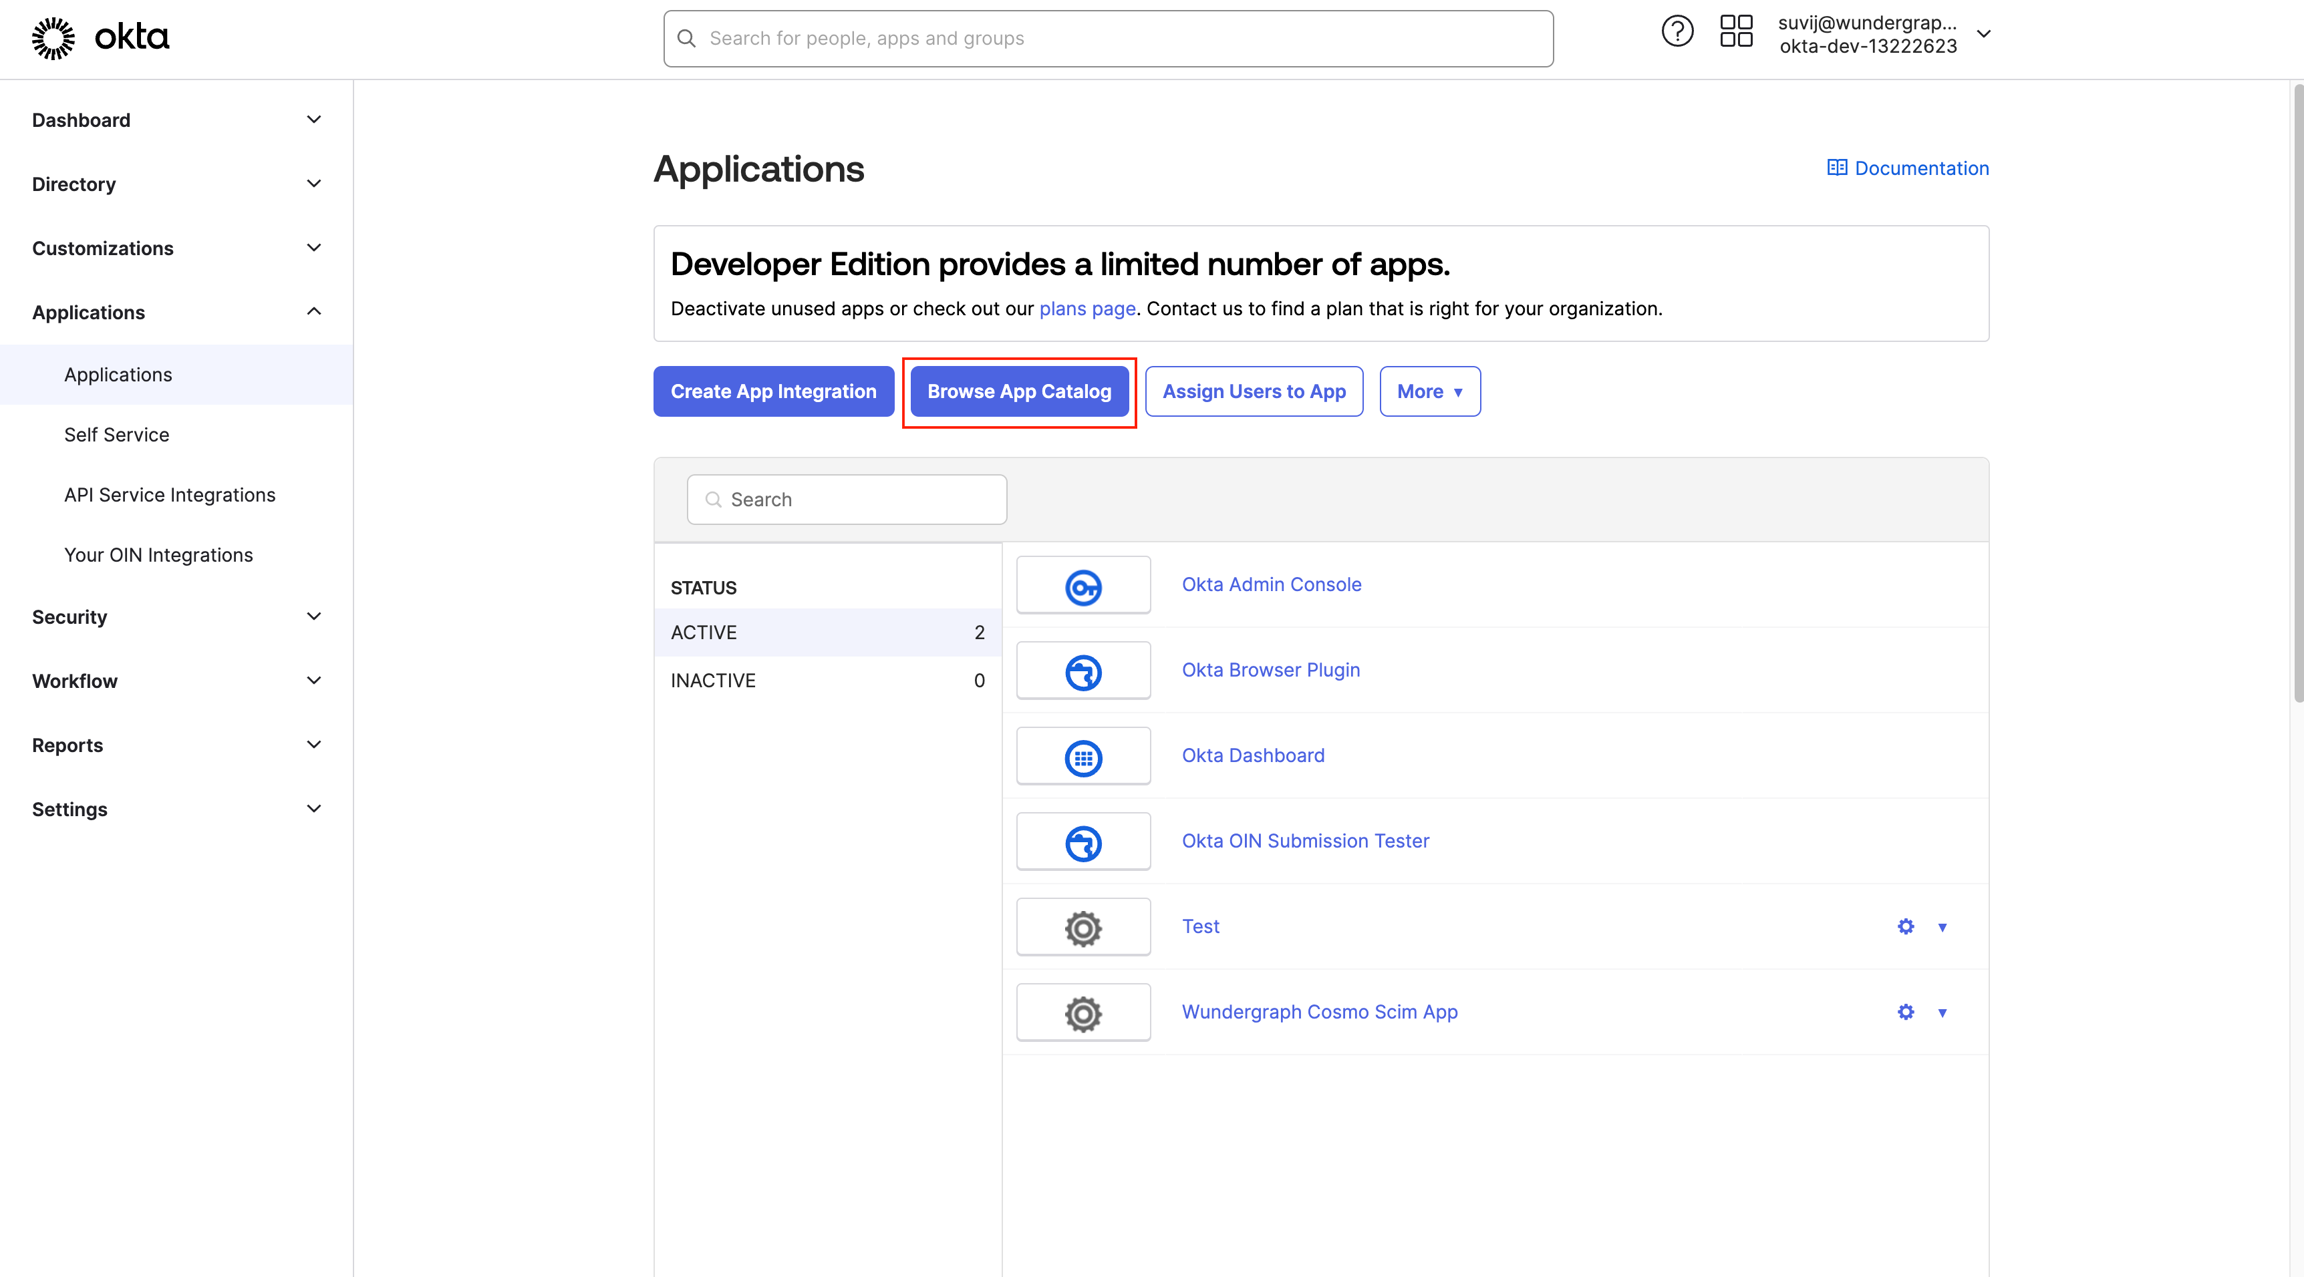
 Navigate to the Applications view within your Okta Administrator Dashboard.
Click on **Browse App Catalog.**
Navigate to the Applications view within your Okta Administrator Dashboard.
Click on **Browse App Catalog.**
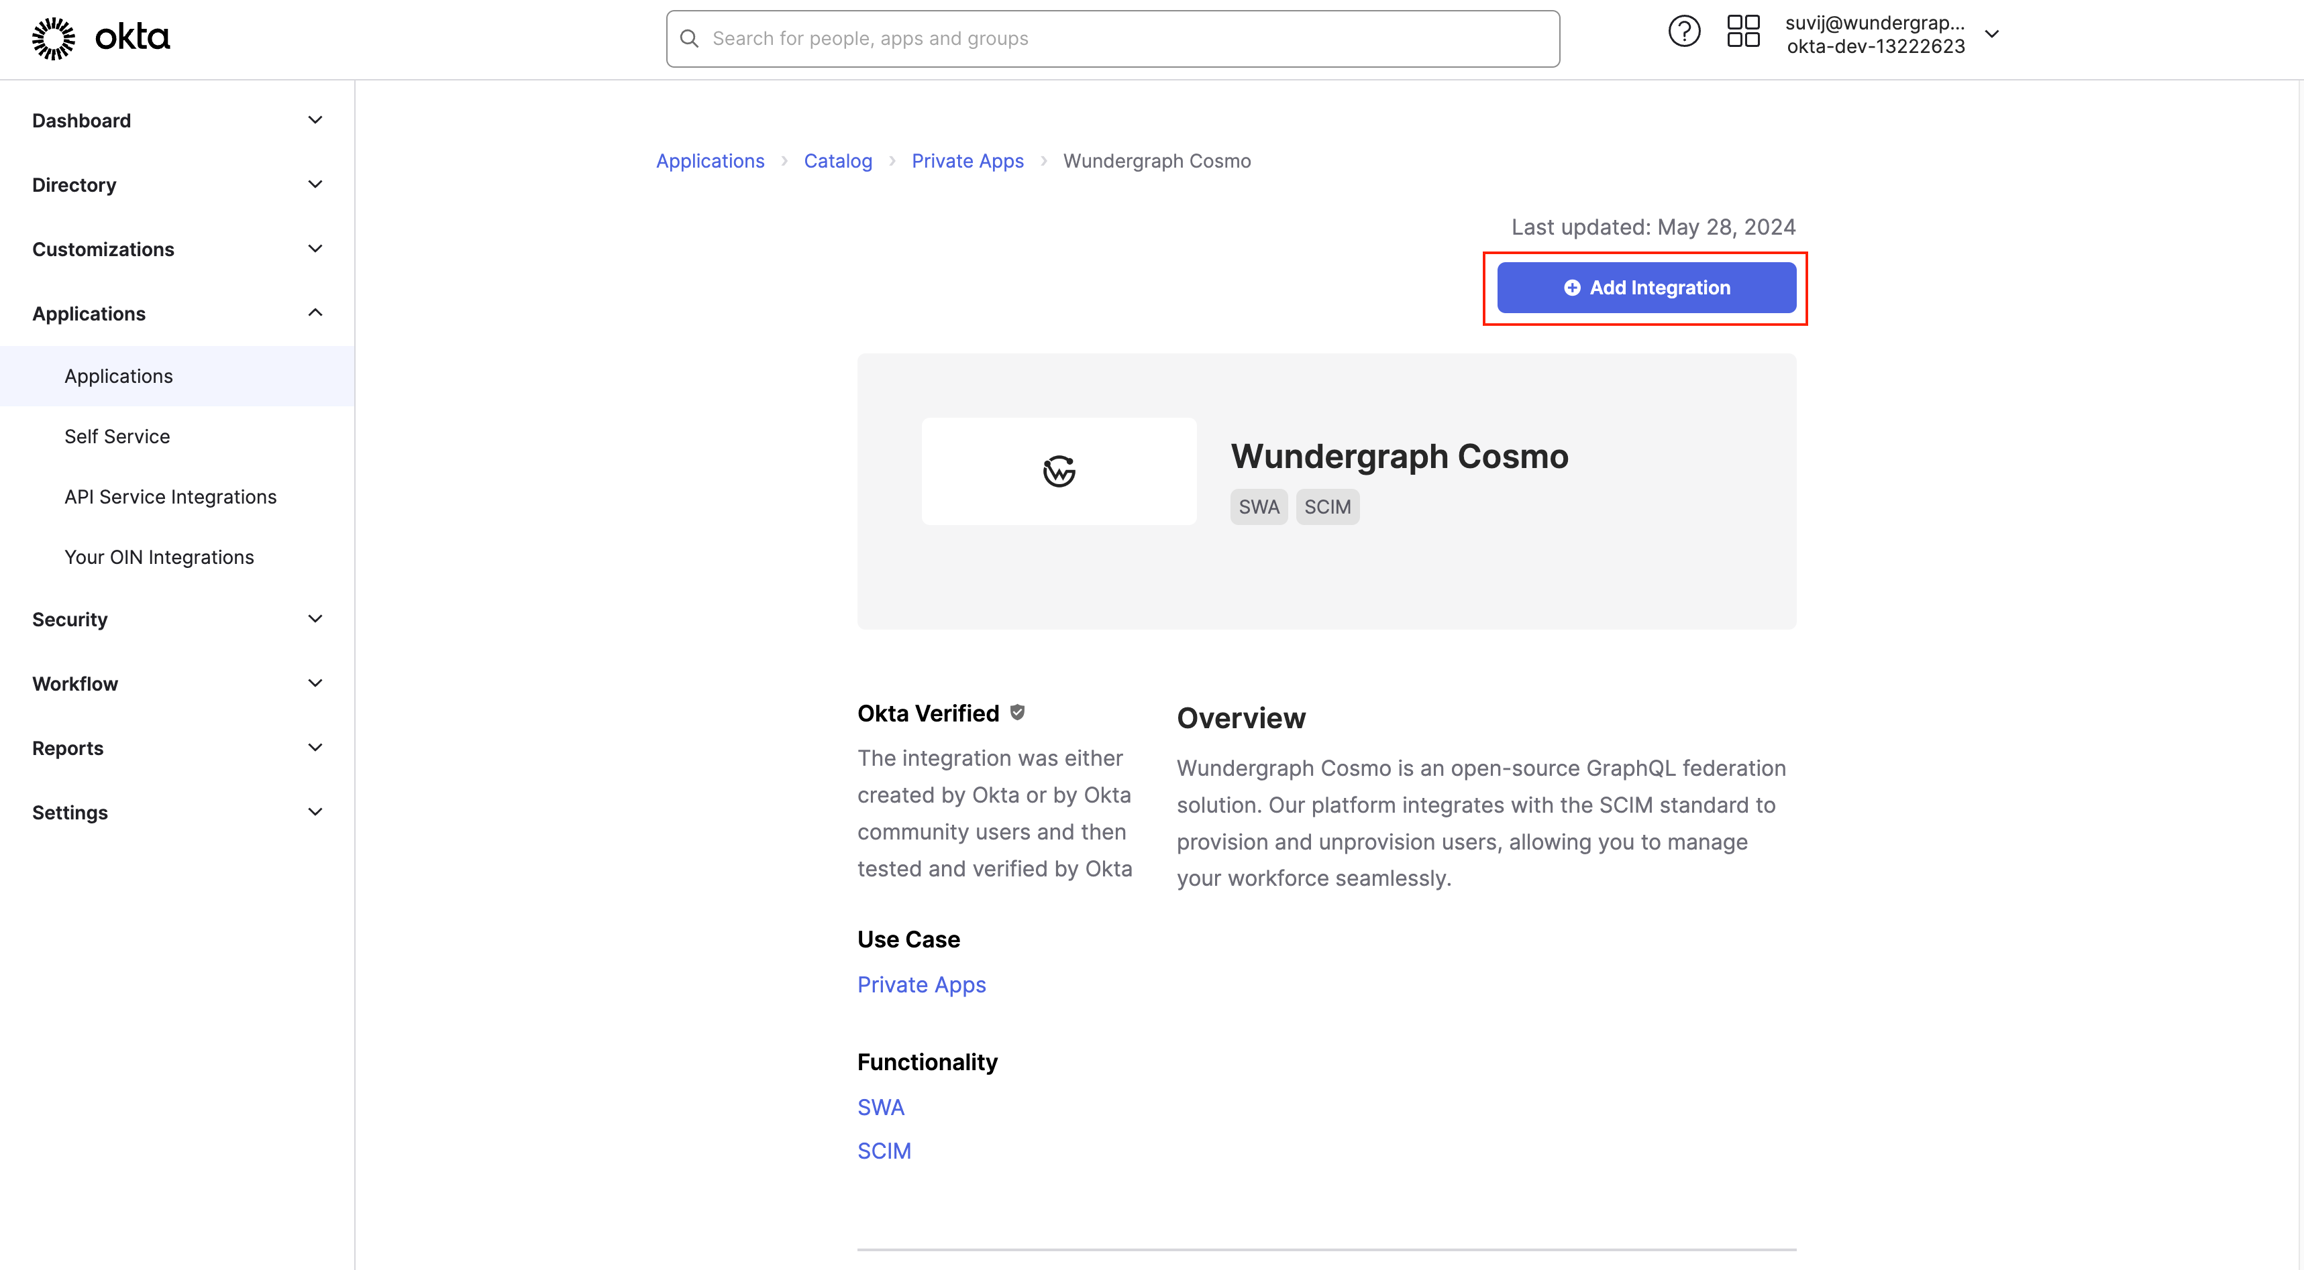
 Search for **Wundergraph Cosmo.**
Click on **Add Integration**.
Search for **Wundergraph Cosmo.**
Click on **Add Integration**.
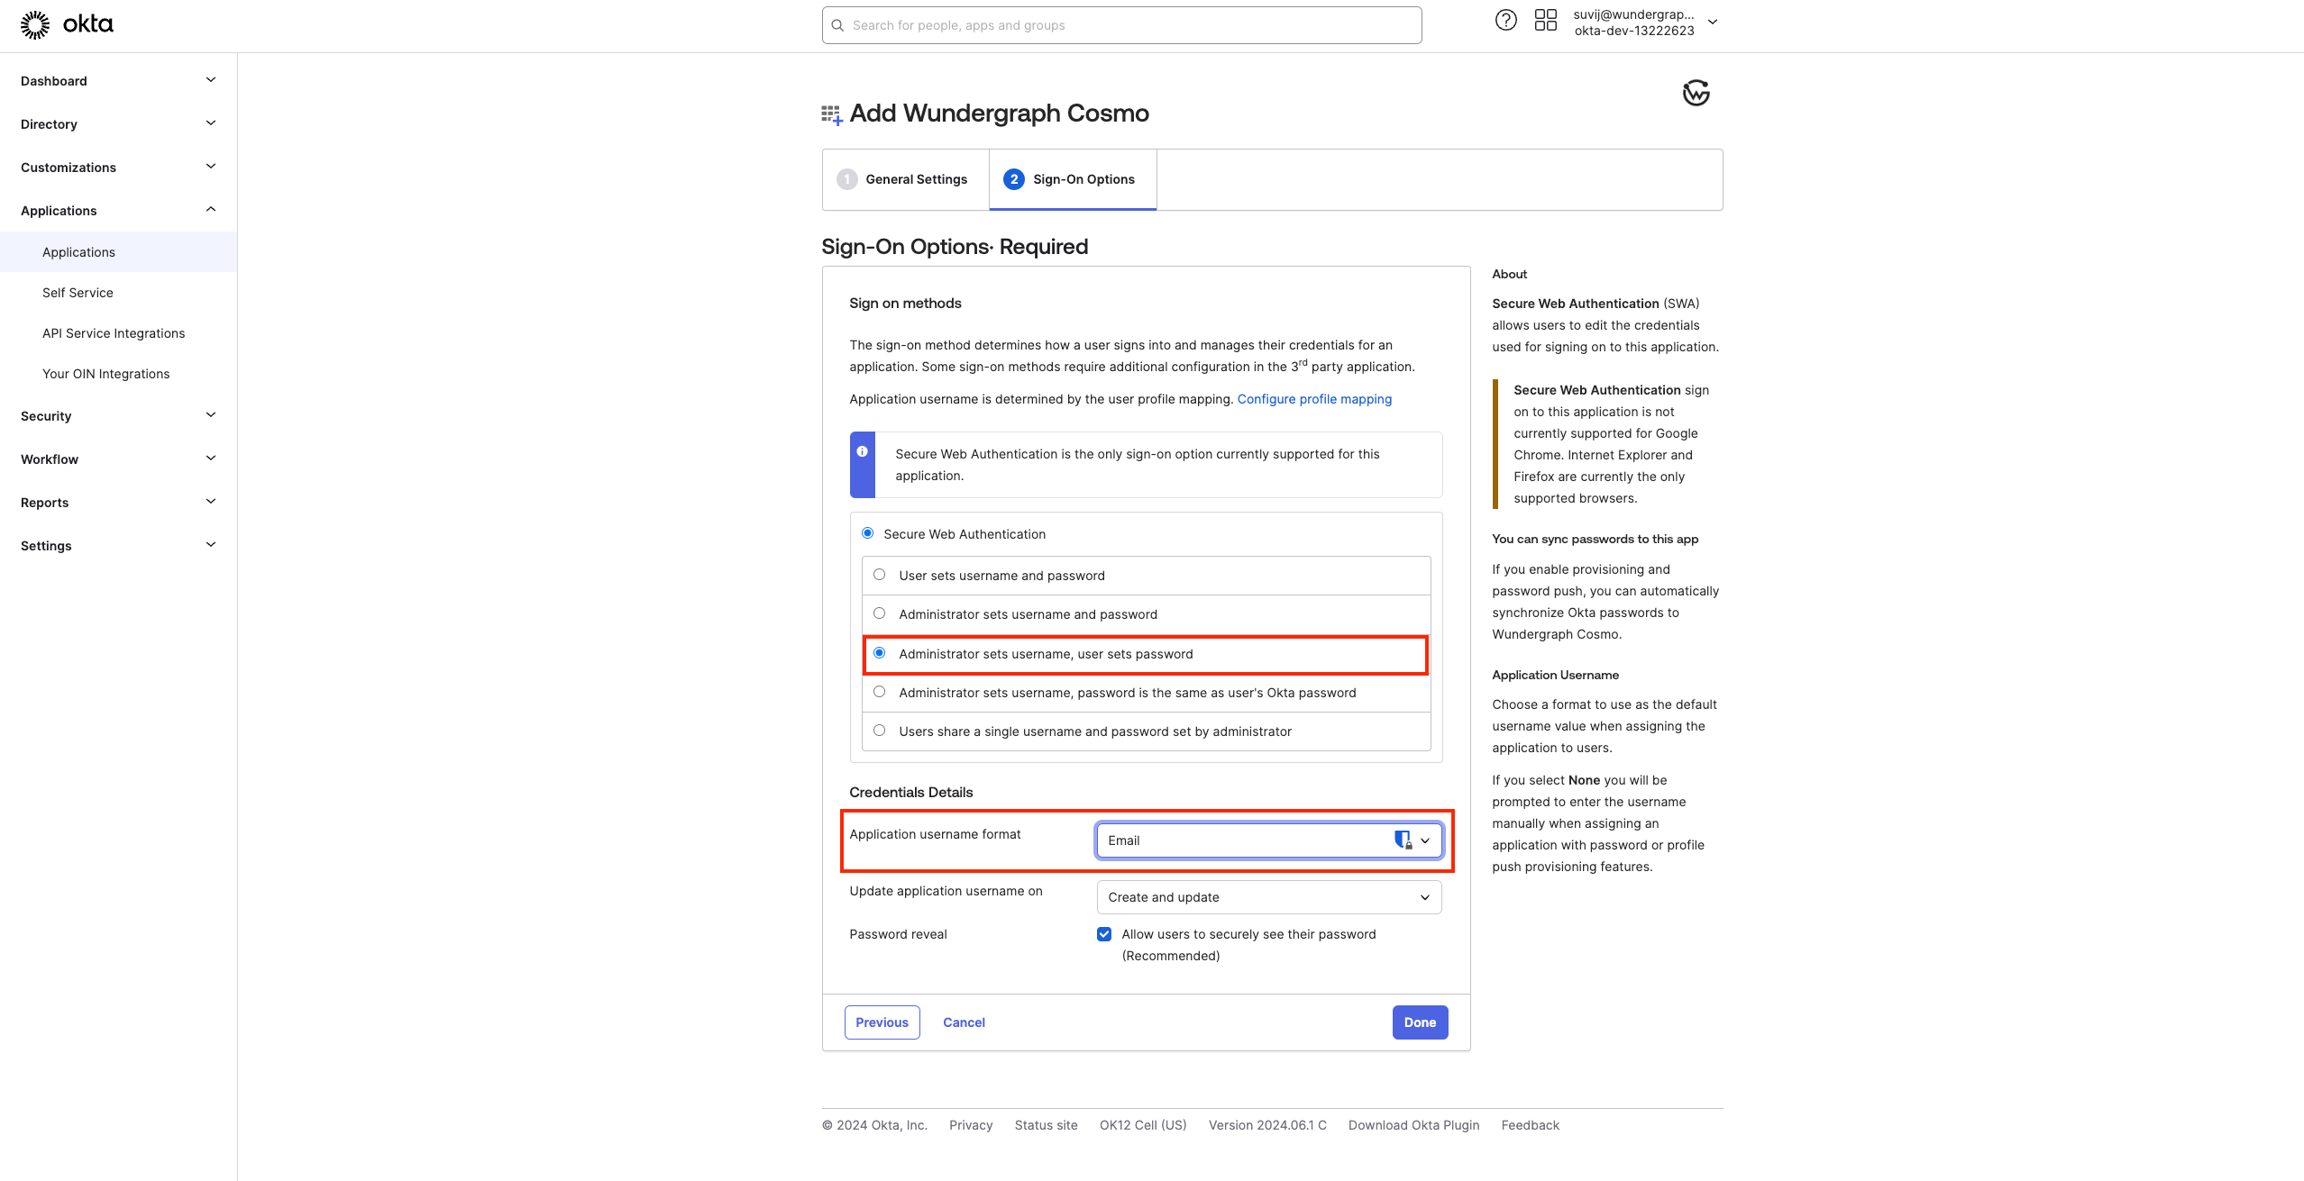
 Now give the app a name and then click on **Next.**
Select **Administrator sets username, user sets password** and for **Application username format** under **Credentials Details** select **Email**and then click **Done.**
Now give the app a name and then click on **Next.**
Select **Administrator sets username, user sets password** and for **Application username format** under **Credentials Details** select **Email**and then click **Done.**
 Navigate to the settings page on WunderGraph Cosmo and enable **SCIM.**
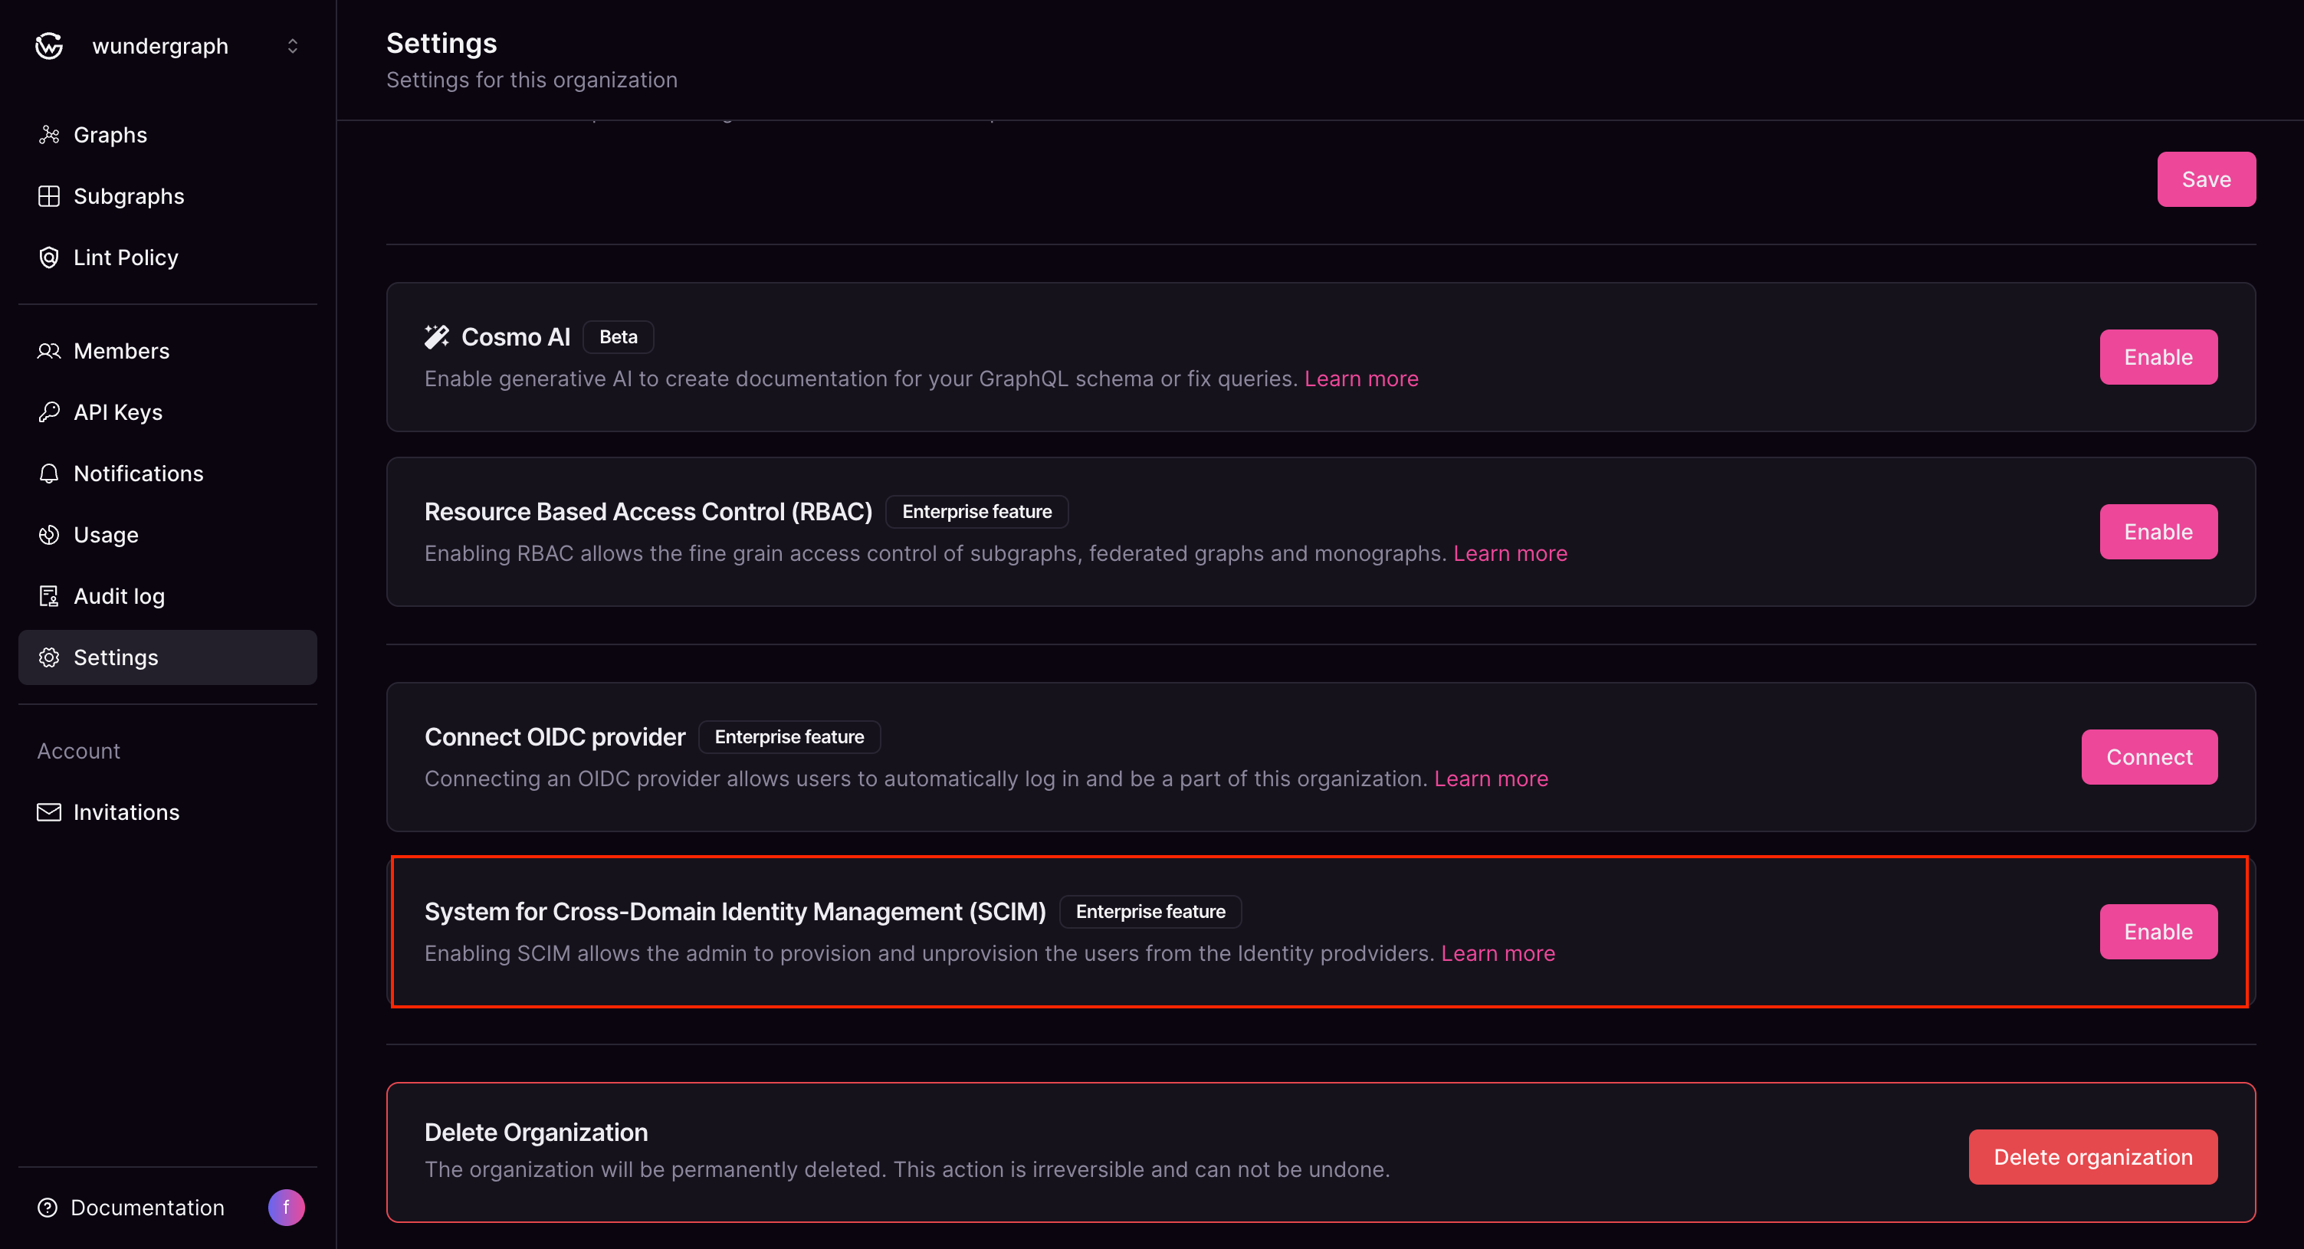 Once SCIM is enabled, you will be provided with a **SCIM Server URL,**copy it**.**
Navigate to the API Keys page on WunderGraph Cosmo and click on New API Key.
Provide the key with a name, select **Never** for **Expires,** then select **SCIM**under **Permissions, t**hen click on **Generate API key.**
Once SCIM is enabled, you will be provided with a **SCIM Server URL,**copy it**.**
Navigate to the API Keys page on WunderGraph Cosmo and click on New API Key.
Provide the key with a name, select **Never** for **Expires,** then select **SCIM**under **Permissions, t**hen click on **Generate API key.**
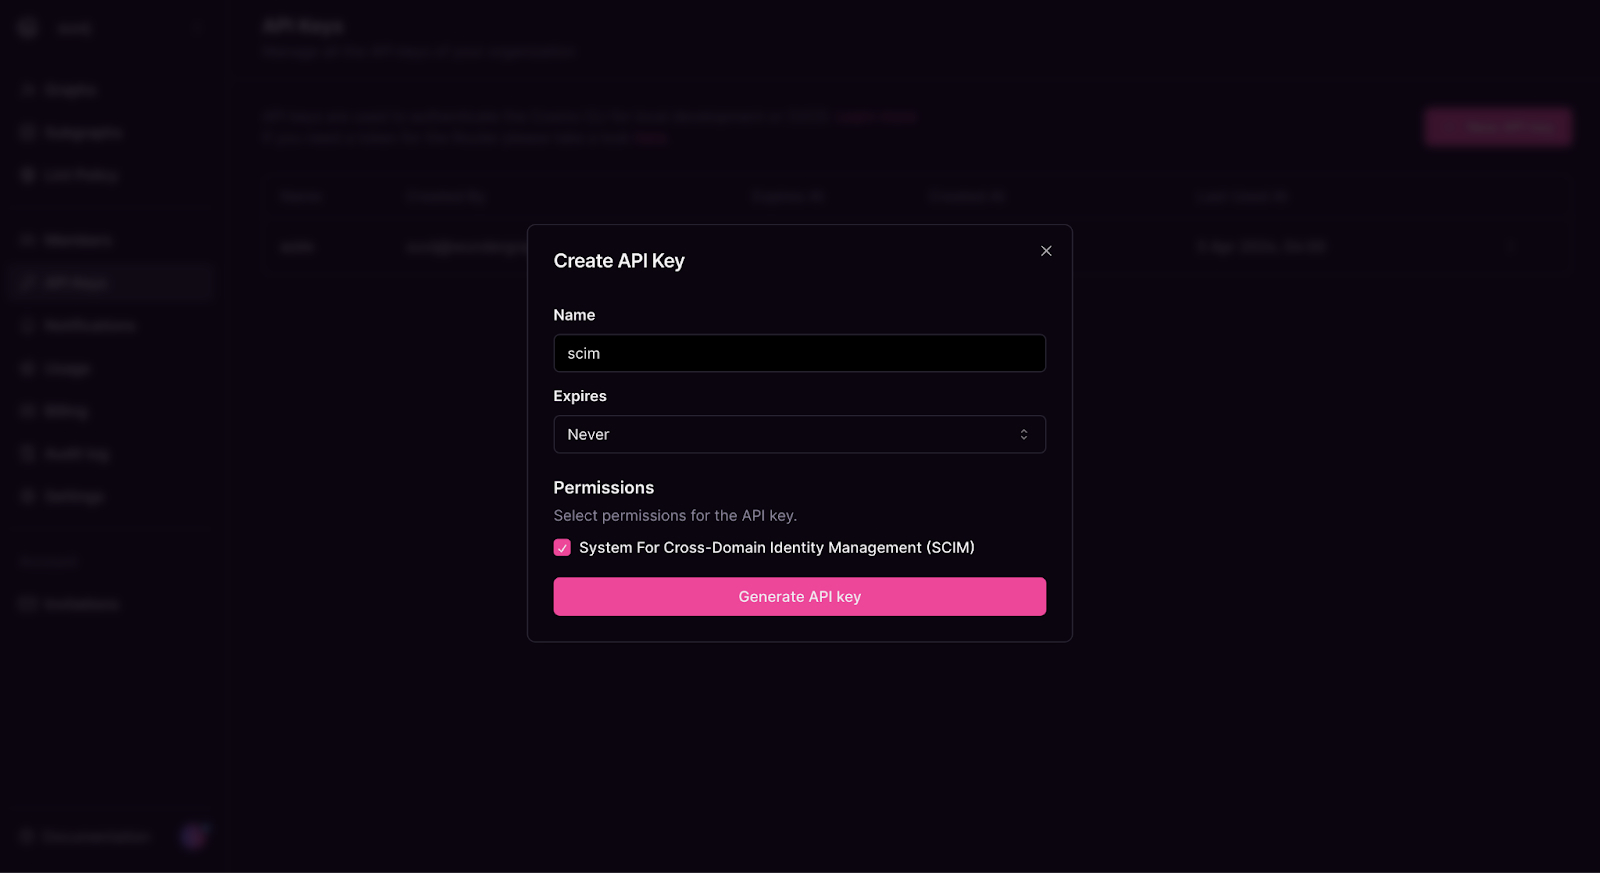 Copy the API key provided.
Navigate to the provisioning tab of the app created on okta, then click on **Configure API Integration**.
Copy the API key provided.
Navigate to the provisioning tab of the app created on okta, then click on **Configure API Integration**.
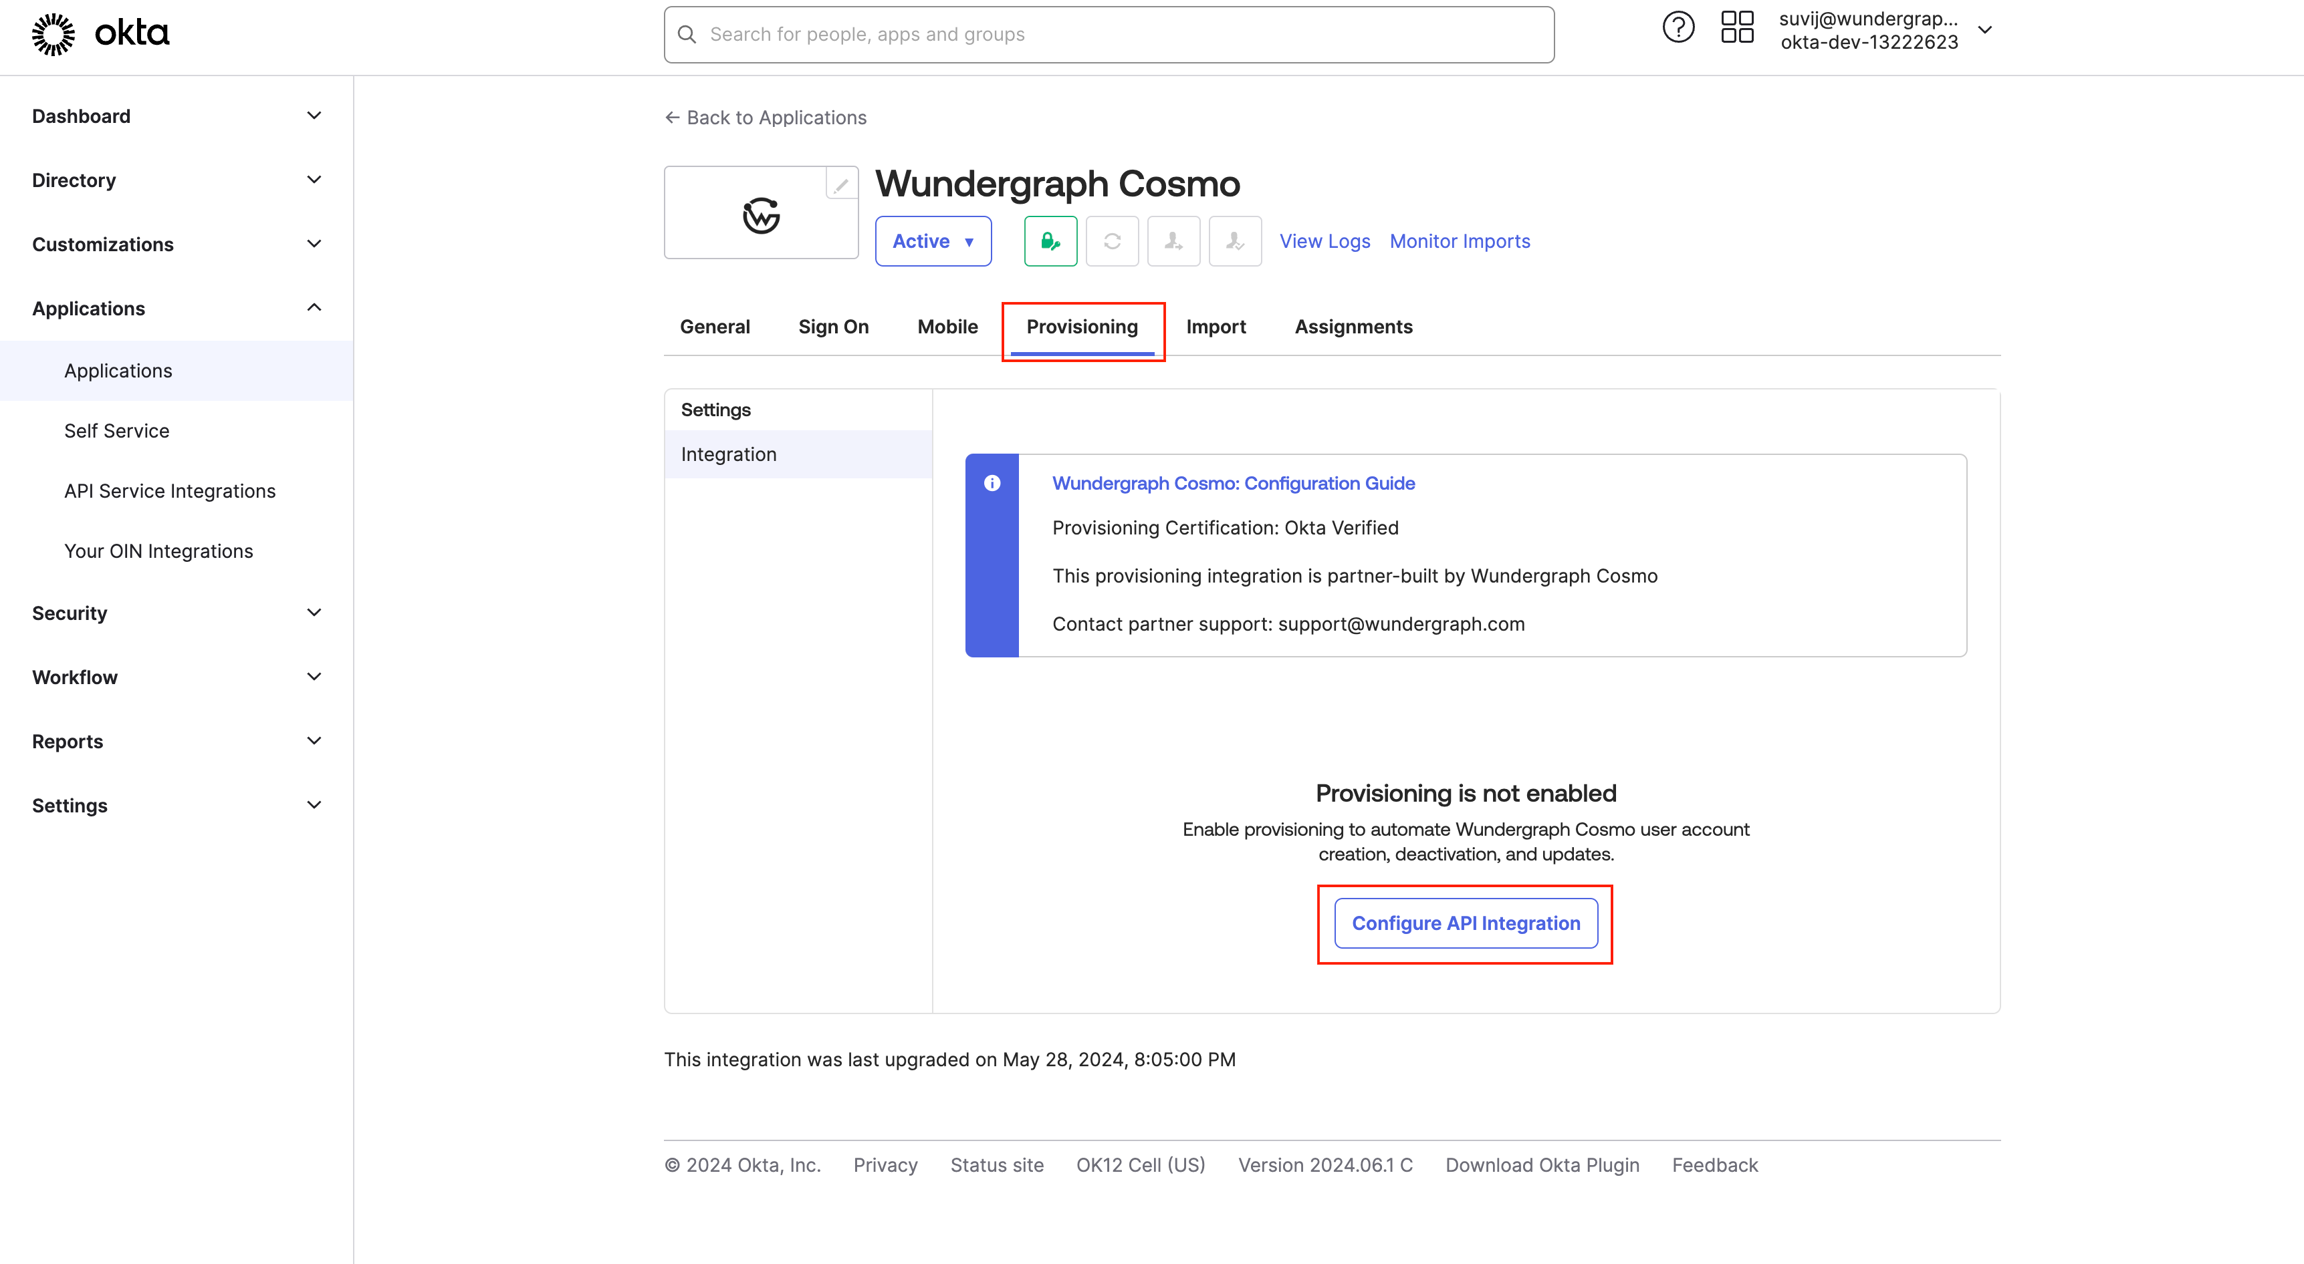 Check the **Enable API Integration** and then populate the **API token**with the **API key**copied in the previous steps.
Click on **Test API Credentials** and once it's verified successfully, click on **Save**
Navigate to the "**to App"** tab**, and** click on **Edit.**
Check the **Enable API Integration** and then populate the **API token**with the **API key**copied in the previous steps.
Click on **Test API Credentials** and once it's verified successfully, click on **Save**
Navigate to the "**to App"** tab**, and** click on **Edit.**
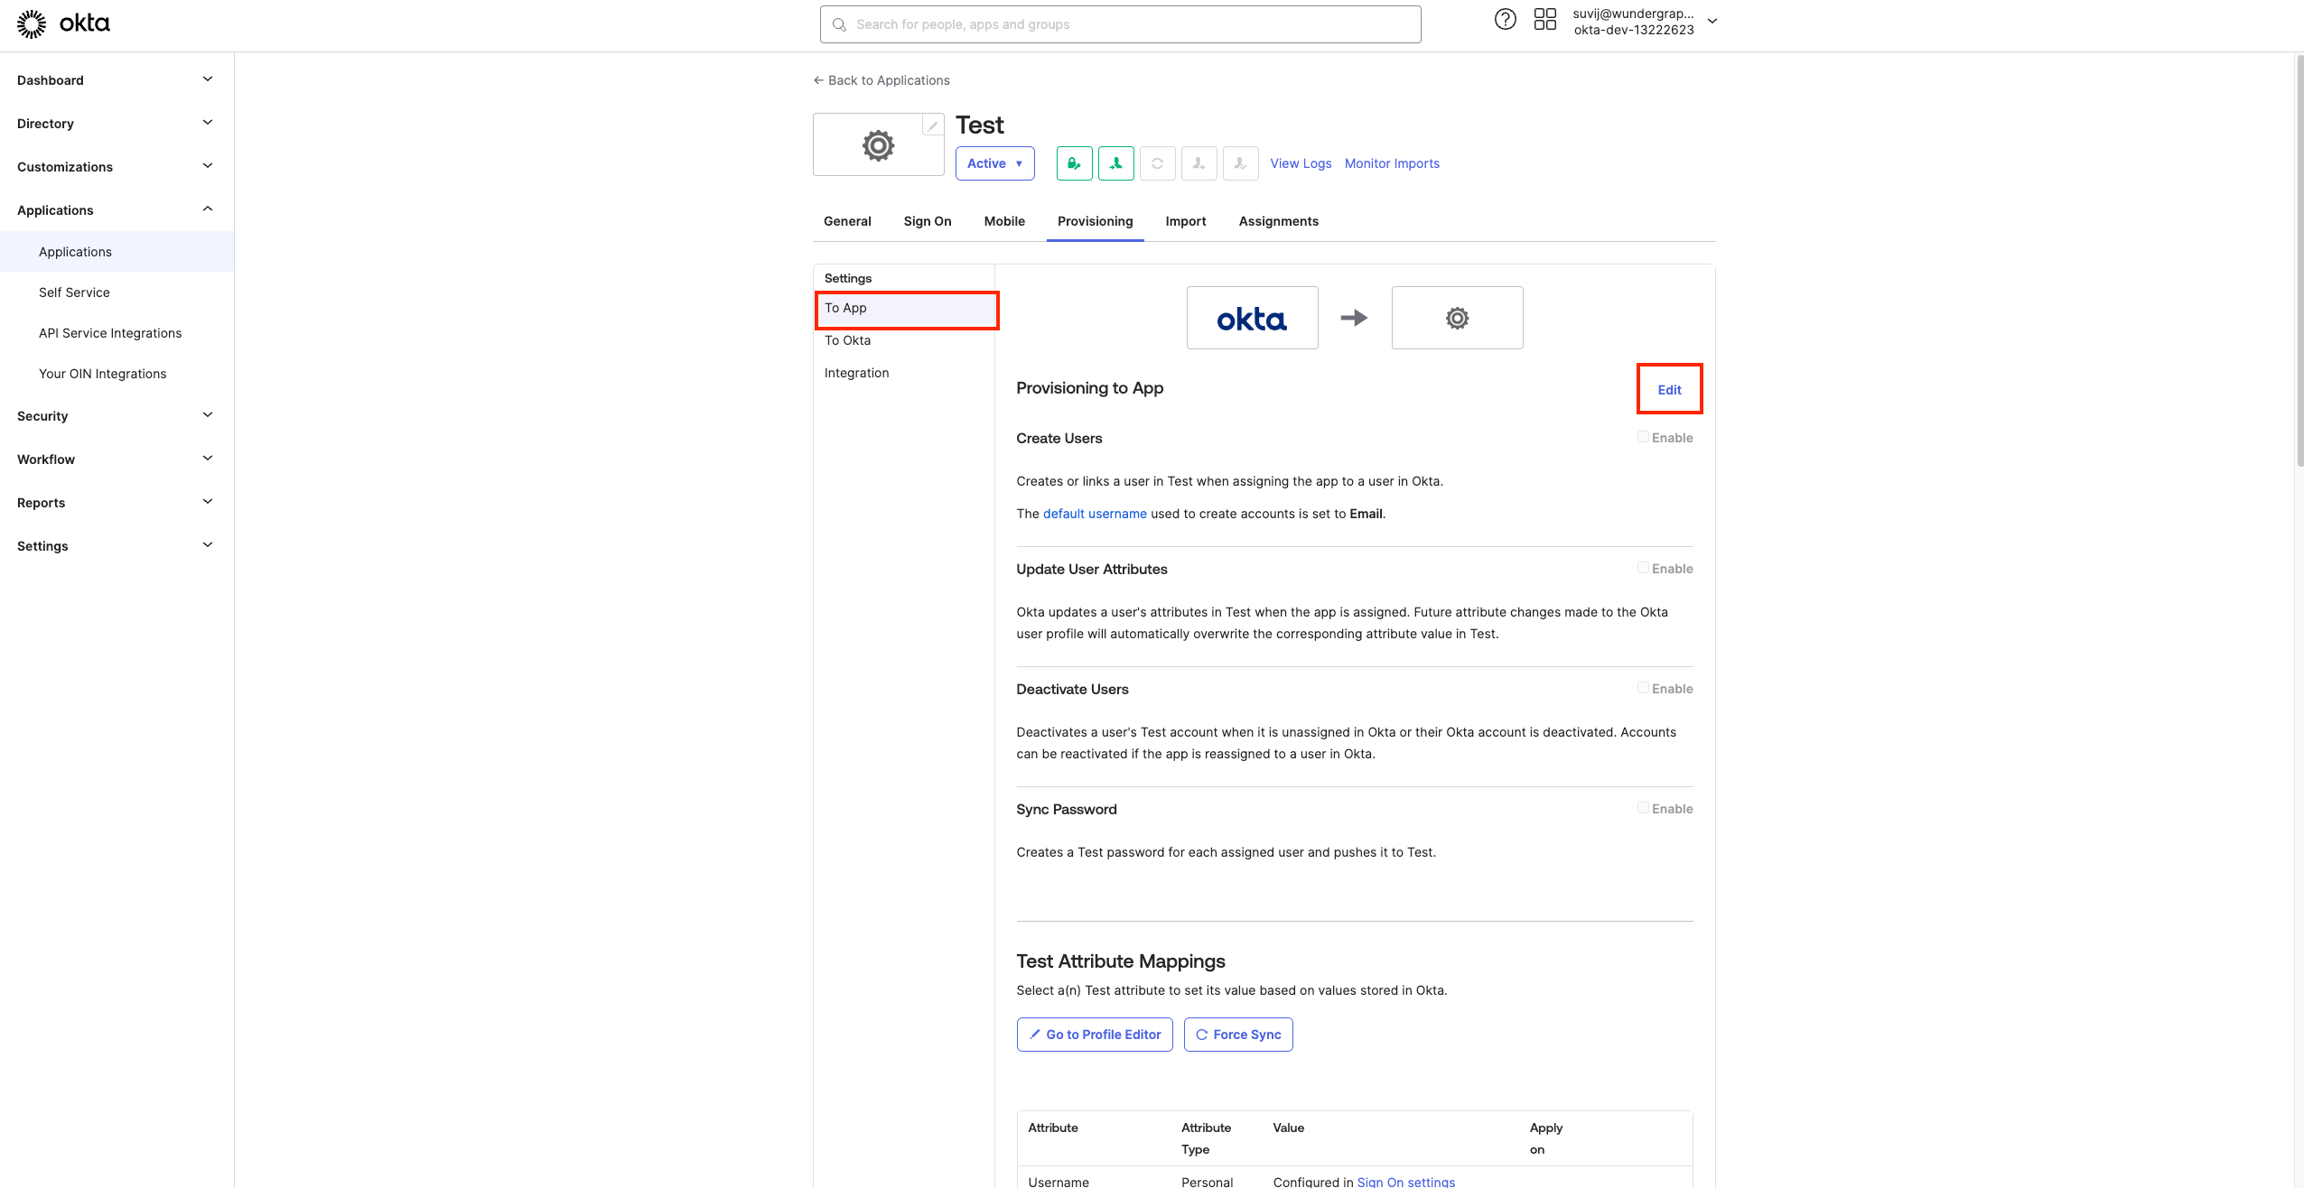 Enable **Create Users, Update User Attributes, Deactivate Users**and **Sync Password.**
Under **Sync Password** for **Password type**, select **Sync Okta Password.**
Enable **Create Users, Update User Attributes, Deactivate Users**and **Sync Password.**
Under **Sync Password** for **Password type**, select **Sync Okta Password.**
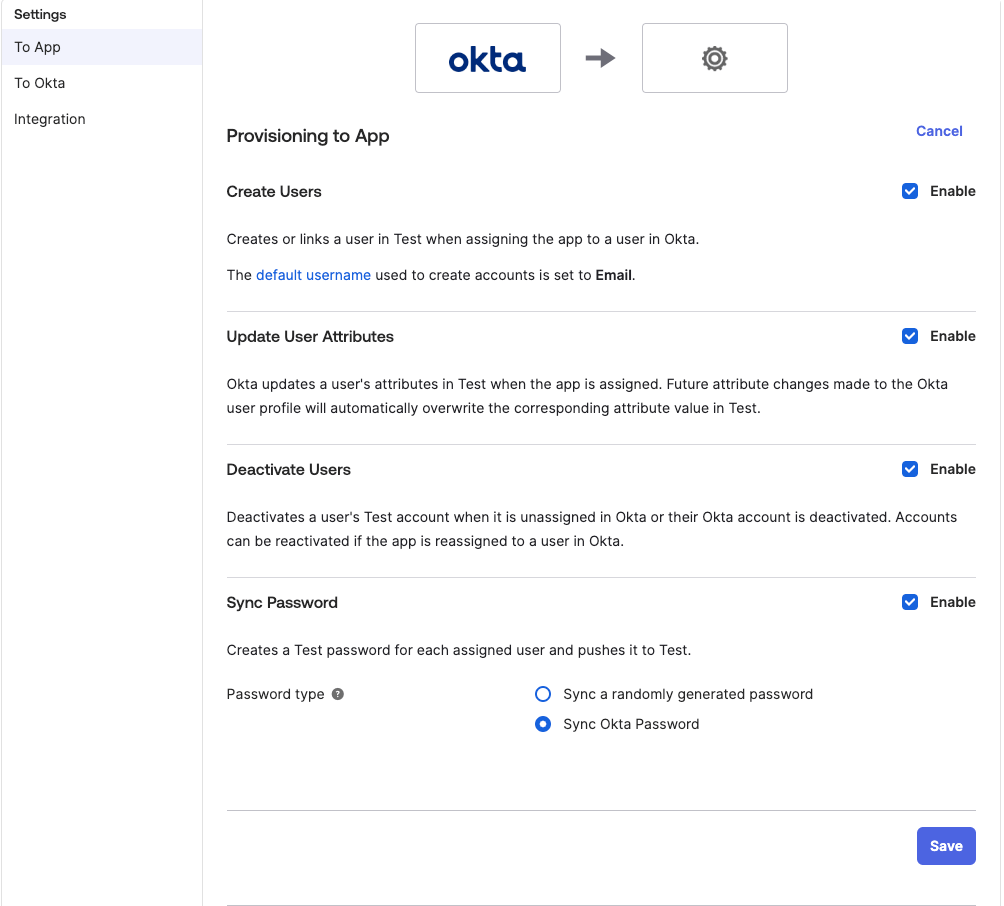 Click **save.**
Now you can navigate the Assignments tab and assign users/groups who should have access to WunderGraph Cosmo.
If you are using both **SSO with OIDC** and **SCIM**, please make sure that the users assigned in both apps are the same.
Click **save.**
Now you can navigate the Assignments tab and assign users/groups who should have access to WunderGraph Cosmo.
If you are using both **SSO with OIDC** and **SCIM**, please make sure that the users assigned in both apps are the same.